Version 1 / 1min read / Updated Sun 08 May 2022 / 3324 views / of verified

This proceedure will cover how to use the advanced mortar system in Arma 3, for fully manual targeting and operation in ACE3.
Equipment needed
- Mortar
- Range table for the mortar you are using
- Map tools
- GPS
What do you need to know
- The range of your mortar
- The position of the mortar emplacment
- Controls of the mortar
Setting up a mortar
- Find a safe and protected location to set up
- Construct the mortar and load its ammo
- Mark you exact position on the map including your elevation.
- Wait for fire mission call
How to target with the mortar
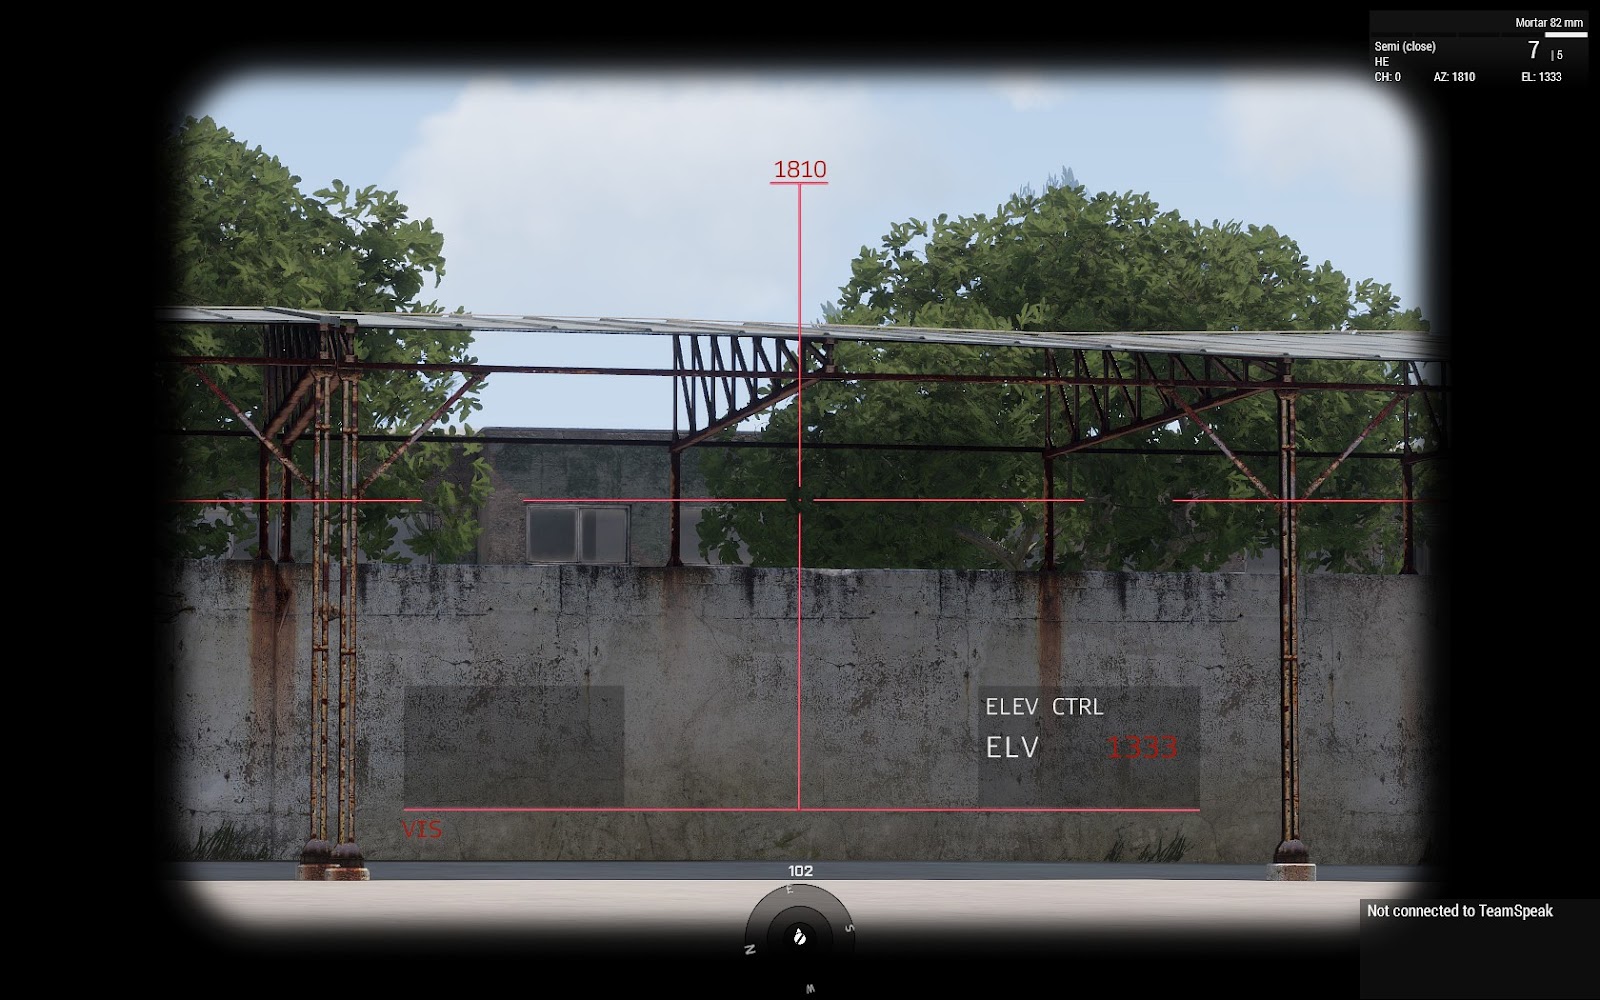
- From the gunner slot look to the aiming view of the system. You see digits in the top which are "mils". These are adjusted by moving your mouse left or right.
- On the bottom right side there is another set of digits denoted ELEV, which stands for elevation. Use page up and page down keys to adjust. You can use the shift key as a modifier to make a more precise selection.
- Mils show you which direction your mortar is facing and ELEV shows you at which angle the cannon of your mortar is inclining.
- In the top right corner you can see a box in this box the last row shows you CH. This is the currently selected charge.
CREDITS
This SOP has been contributed to by 1 editors:
Lieutenant Colonel James
REFERENCES
UNITAF Standard Operating procedures (SOP) are adapted primarly from US Army Training and Doctrine Command (TRADOC). Our written and audio procedures are a combination of the following primary source materials, as well as our own learnings, modifications and adaptations:
- US Army Techniques Publication, Infantry Platoon and Squad (ATP 3-21.8)
- Soldier’s Manual of Common Tasks Warrior Leader Skills Level 2, 3, and 4 (STP 21-24-SMCT)
- The Warrior Ethos and Soldier Combat Skills (FM 3-21.75 / FM 21-75)
- Leadership Development (FM 6-22)
- Dyslexi's Tactics, Techniques, & Procedures for Arma 3 (TTP3)
Start of Section
End of Section